Evacuation Tutorial
This tutorial presents an integrated approach for performing evacuation simulations with MATSim and the MATSim extension Evacuation. This integrated approach comprises all steps of the workflow for performing an evacuation analysis, i.e., selecting the evacuation area and defining the population, specifying the behavioral parameters (i.e. the pre-movement time distribution and the mode of evacuation - car or pedestrian), and analyzing the simulation output. These steps can all be performed within one graphical user interface. Additionally, two extensions of MATSim for simulating public transport and for changing the network during the simulation (i.e. network change events) are accessible from the GUI.
Setup
macOS users
- Download evacuation-0.9.0-SNAPSHOT.dmg
- Open .dmg and move evacuation.app to Applications
all users
- Download evacuation-0.9.0-SNAPSHOT-release.zip
- Unzip it.
- Open terminal and ``cd'' to folder evacuation-0.9.0-SNAPSHOT
- Run it by invoking:
java -cp evacuation-0.9.0-SNAPSHOT.jar org.matsim.contrib.evacuation.run.ScenarioManager
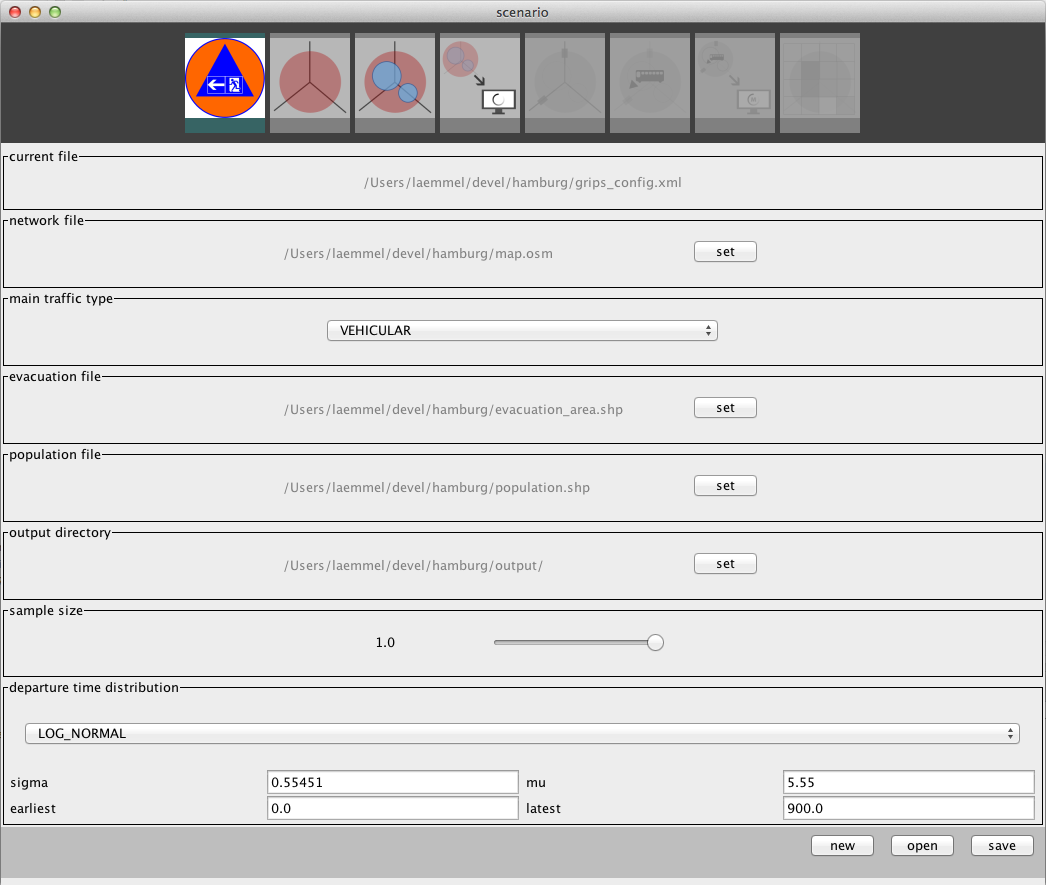
What you get will look like this:
Quickstart
If you just want to get a quick impression, then the following steps can be performed within a few minutes:
OSM Go to www.openstreetmap.org search for your favorite place and download a (small) osm. Please choose a small area, e.g. 100m by 100m. This is sufficient for the beginning and the size of the exported area is limited.
Run the ScenarioManager as described in the previous section.
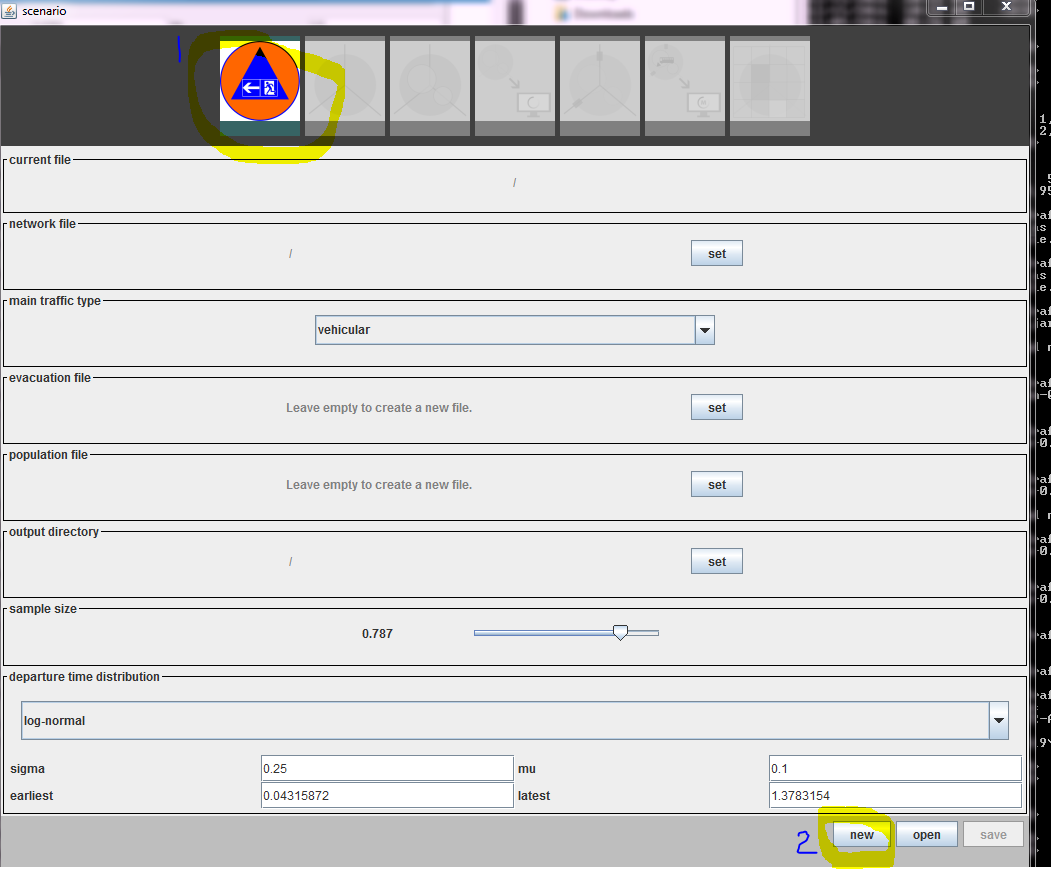
Create a scenario by clicking the leftmost button first and then "New". Go to the directory where you’d like to save your project and name the project file (e.g., london.xml or scenario.xml).
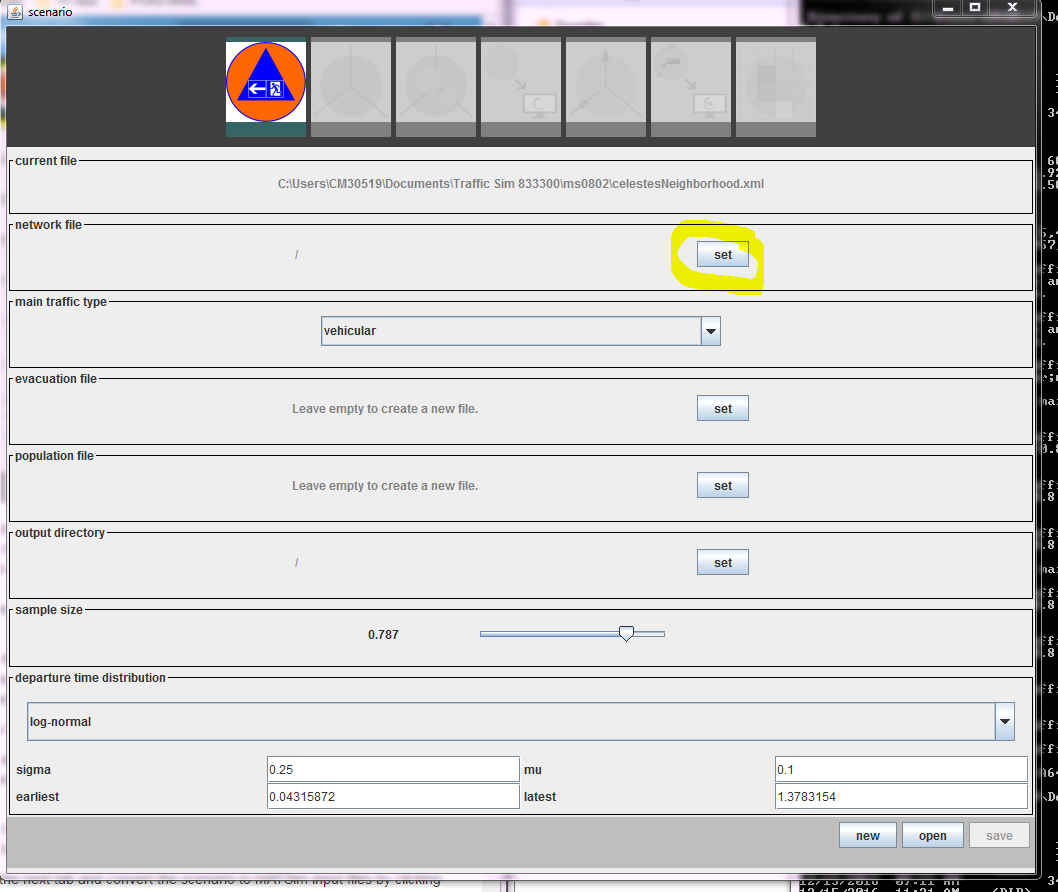
Specify The path of the osm-file (by clicking "Set" next to network) and the output directory. This step has to be done only once. After the scenario-file has been saved, you can just open it in the Scenario-Manager. Also specify your output directory.
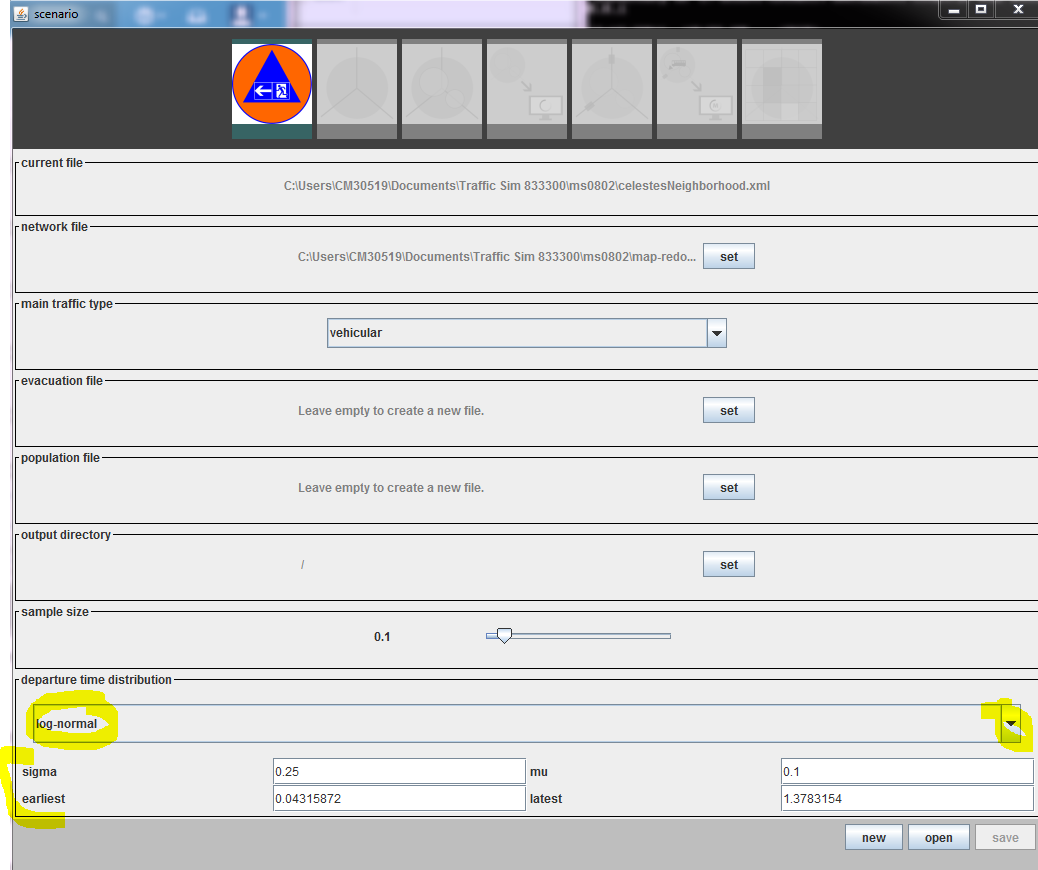
Sample size Set the sample size to 0.1 (you can use the mouse or the cursor buttons of your keyboard).

Departure Specify the departure time distribution. Possible values could be: normal distribution, mu and sigma 600 seconds (10 minutes), earliest 300 seconds, latest 1200 seconds (20 minutes).
Save your scenario file.
Area Switch to the area tab. You can define the circular evacuation area by keeping the left mouse button pressed and defining the center and radius. Don’t forget to save your changes.
Population Switch to the population tab and define the population by drawing circles again (handling is similar to area). Don’t forget to save your changes.
Convert Switch to the next tab and convert the scenario to MATSim input files by clicking the "run" button. The MATSim files will be stored in the output directory specified in the beginning.
Run the MATSim simulation by skipping the next tab/button (road closures) and switching to the simulation tab (with the little M for MATSim on the computer screen). Click "run". This will take a while. The output directory will be overwritten. If you want to keep previous results, please rename the output directory.
Analyze your simulation results by switching to the final tab after the simulation is finished.